Thursday, November 19, 2015

Sauerkraut 2015, Take Three

Well we ran out again... so we made some more again!  I wrote in my post Take Heed! Watch those fingers... about slicing the end of my thumb off, well we did finish up that batch, before my Stone Creek Trading Cabbage Slicer came in.  So after the half failure I wrote about in my post Sauerkraut 2015 Part II - A Lesson in Fermentation, we have learned from our mistakes and I've been checking it every day or two since it's conception.  It has been in the basement for about a week now and I thought I'd share some pic's.

CO2 bubbles coming up between the fermenting stones.

You can see above that there is a decent about of foam forming on the surface, as well as a decent amount of cabbage that has floated up to the top.  Previously we have put large cabbage leaves between the cabbage and the weights, which may have contribute to our partial past failure, as they might have trapped the bubbles... just a theory.

Fresh cabbage and sauerkraut soup, just what the doctor ordered!

Okay, I'll admit... for the first week or so, this stuff does stink.  Each time I go down to skim off the surface, I smell it.  It's not overpowering, but I smell it.  It's nowhere as bad as changing a diaper blowout, believe me!

Anyway, this is how I cover the crock while I'm fermenting... it's a kitchen towel and a shoe string with a prusak knot and a bowline so I can tighten it up when I'm not inspecting it.  Talk about fermenting on a shoestring budget!  (Sorry,  I couldn't help it)

My kitchen towel and shoestring lid...


Okay, I guess I don't have as many pics as I thought.  Hope this was informative for somebody!
~Clinton

Speedy delivery... speedy delivery! (A Stone Creek Trading Cabbage Slicer Unboxing, Size Large)

Well that was a pleasant surprise!  Last night I walked in the door of my home and was greeted by my beautiful wife and children.  I am a wealthy man!  Then I walked in a little further and found a large box with my name on it.  I had mentioned previously (Take Heed, Watch those fingers...) that I ordered a cabbage slicer after I skillfully sliced the end of my thumb off.  Amazon told me it was going to be another week before it might be delivered... but nope, there it was.

Unopened, my first cabbage slicer.


At first glance... "Wow, that's big!"  Now I know that the description in gave the exact dimensions, but I didn't really pay attention to it.

After pulling it out of the bag, it looked decent.  It used some chintzy nails to hold it together (I was taught from a young age that fine woodworking doesn't use nails, especially from a nail gun!), so I question how long that will work (I'm tempted to drill through it and glue in dowel rods, before it breaks).  I think I may have been taught some obsessive compulsiveness at the same time...

"Hi, my name is Clinton and I think  I'm OCD..."

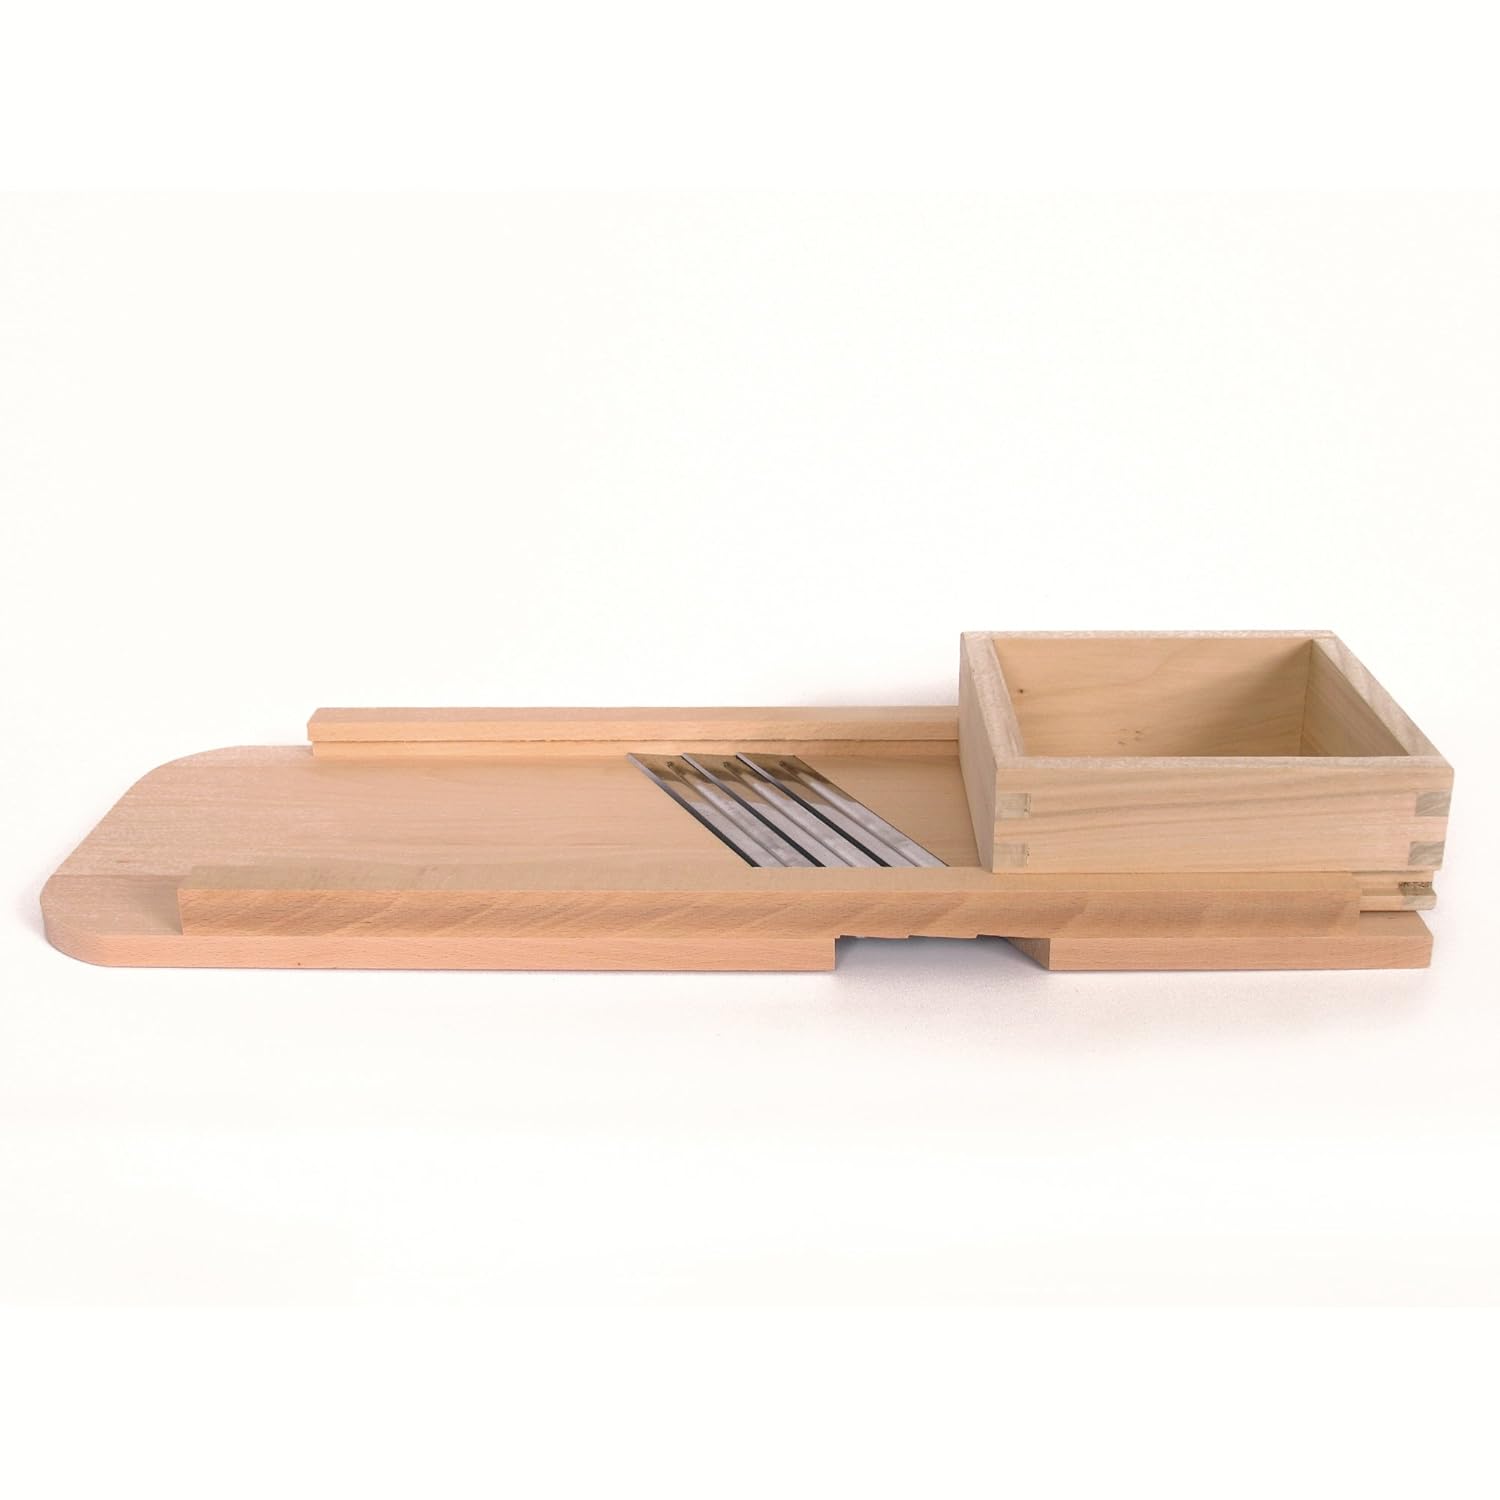
The blades on this thing are certainly sharp enough to slice the remaining skin off my thumb!  But it also looks like this thing may be big enough that I won't have to do anything short of sliding the box up and down, keeping my fingers far from the blades!  (That will be nice, if it is in fact the case.)  There are three blades in this unit (the extra large has four) and they are removeable, should they need to be sharpened.  I don't know if you can get replacements if need be... not to self, check on that.

UPDATE: STONE CREEK TRADING DOES NOT SELL REPLACEMENT BLADES!  (DON'T MESS THEM UP IF YOU GET ONE OF THESE.

The box uses a standard box joint at the corners (versus the dove tail join that my dad would have encouraged me to use, would I have built one), which is probably good enough...

Yep, the box will slide right off...

The description off Amazon says "This is a natural unfinished wood product. This means it does not have a varnish or paint coating on top of the natural wood. However, it is sanded smooth and ready for use."  I take that to mean that it has been cleaned up with sand paper.  While that may be true on the flat pieces, the edges could still use some sandpaper to knock off some loose ends.  Again, not necessary... but I wouldn't put my name on it till I had done that!

Instructions!

So it is untreated poplar wood, made in Poland... interesting.  They say you don't need to treat the wood... I'm not sure about you, but I have alarms going off in the back of my head when I read that.  I've read some suggestions to coat wood with mineral oil (too much consumed can have a cleansing effect), let dry and wipe off excess.  The method I plan on going with, however, is walnut oil.  It was used extensively in France during somebody's reign (probably some Louis the umpteenth) as a wood coating and it's food, so what more could you ask for?  Oh, I've also read that olive oil can go rancid... no thanks, not in my food!

Now I'd like to go back to something in the picture above real quick... at the bottom of that little card with instructions and care, the retailer was kind enough to also put their website.  Now this might seem insignificant, but it's not!  Being the curious person I am, I ventured over there to take a look at the other things they sell... and happened to see this very product for sale with a price tag of $25 less than I paid off Amazon!  Now I don't know about you guys, but that's significant in my book!  But what about the shipping cost?  Ok, yep... got that one too!  The shipping to my house is estimated @ $9 from these guys, so the real price delta is 16$, still significant!

Well I have yet to use this thing, but it appears as though it will significantly speed up the process of shredding the cabbage the next time we need to ferment some foods.  I'll be sure to post an update when we use it!

Till next time, God bless!

Wednesday, November 11, 2015

Take Heed! Watch those fingers...

A few times I have written about using my Borner mandolin slicer... well last night I was using it and I got bit!  I won't show you a picture, but needless to say, my thumb ain pretty!  Recently I had been discussing with my wonderful wife if we should invest in a quality cabbage slicer... well, I think I answered that question! 

Now on order with Amazon is this little wonder of food science creation...

Wood Cabbage Shredder - Slaw Board - Large

Now one issue with this thing is that I don't see a board that goes inside the "sled" to push down on the cabbage.  I'll have to make one of my own, so be on the lookout for that, along with a review. 

On another note, we recently purchased another 5 gallon Ohio Stoneware crock.  I looked all over the internet and found the best price of roughly $70... then I called the local Ace Hardware... they had one in stock for only $56.  Whoohoo!  While Ace may not be a "local" store, its sure a step in the right direction compared to Lowes or Menards!  While I was there I saw a manual meat grinder (looked decent actually), a food strainer and a few other cool things for a homesteader.... I'm gonna recommend you guys check them out!

So all that to say, we are turning into fermenting fools!  I recently checked out a book from the library titled In The Charcuterie: The Fatted Calf's Guide to Making Sausage, Salumi, Pates, Roasts, Confits, and Other Meaty Goods.  That's a cool book!  It covers broth's, fat's, butchering and processing of meats.  Hopefully sometime in the future I'll be able to acquire a sausage press and start making some fermented meats... bu that's a road I'll have to wait to travel until a later stage right now...

To close, keep your fingers away from your blades!  They don't play well together...
~Clinton

Monday, November 2, 2015

Repairing Tools: Power Cords

A quick chat about electricity and repairing tools...

UNPLUG IT!  DON'T TEST IT WHILE IT'S TAKEN APART!  DON'T DO THIS WHILE YOU ARE DRUNK! 

DON'T BE STUPID!  I'm not responsible if you can't follow those guidelines, or even if you can! 


Depending on your mechanical aptitude, your tool kit may consist of one of those 10in-one screw drivers and a pliers.  On the other end of the spectrum, you may have a full machine shop, wood shop, welding booth and paint booth.  Me, I fall in the middle.  Like most Americans, I have limited funds, which means I have to do with what I have, save until I can afford that next tool or borrow one!  Recently I have been borrowing a table saw, which has been awesome.  But Tuesday night I decided the circular saw I got over 8 years ago for a wedding gift (I have an awesome aunt who picked it out for me) would be faster and easier... unfortunately this allowed me to be careless as well.  About 0.05 seconds in to cutting a board, I felt a quick jerk, similar to a fish grabbing your hook, before my saw stopped working...

Whoopsie!  My saw with the handle taken apart...
As you may have guessed, I cut the power cord about 18" from where it terminates inside the saw.  Being a handy fellow ("Hey, if the women don't find you handsome, at least they'll find you handy!"), I quickly got out my duct tape and... eh, no.  I didn't do that...

As you can see above, I took off part of the handle so I could get to the guts of the saw.  Below is a better picture.

Holding the switch in my hand.
These saws use a trigger switch in the handle to control the flow of electrons to the motor.  The eyelet terminals on the ends of the wires would have to be replicated on the plug end of the power cord if I was going to use this saw again!

Here's what I would have to re-create

In this case, I was very fortunate to have just the supplies on hand!  I originally bought this kit because I wanted to make a Steven Harris battery backup system, but unfortunately never have, due to the cost of the batteries.  But the tool kit that I bought for this is pictured below.  It's a
Neiko® 50413A Wire Terminal and Connection Kit with Crimpers/Wire Stripper | 175 Piece Set.

 
The wire terminal and connection kit, with crimpers!

At roughly $13 (current price), this thing is a must for anyone who repairs anything!  I've used this to repair a laundry dryer for somebody, numerous things around the house and now my circular saw.  I highly recommend you get two of them!

Okay, back to fixing things...

Trimming the remaining cable to square off the ends
You can see in the background of the pictures above that eyelets were installed on the ends of the wire and attached to the switch via screws.  This means I needed to put new eyelets on the remaining power cable.  To do that, I first trimmed the cable flush and peeled back the liner a few inches, matching the length of the white and black wires sticking out to the original. 

Strip the wires...

Slip the eyelet on...

Crimp the eyelet in place...

Slip the cable protector back over the cord...

Screw the power cable back down on the switch...
Let's take a moment here... looking at the above picture, I should have made the black wire a little bit shorter.  I could have cut the eyelet off, trimmed the cord to the right length and put a new eyelet back on, but instead I just decided to fold the wire into the handle frame.  If this saw a lot of movement, I'd be more inclined to do the just described fix, but this should stay in place and I doubt I'll have any problems.  If I do, well I guess I can fix it again!

Everything tucked back in place...

The final picture...

Electricity- If this had been a DC current tool, it would have been extremely important that I put the wires back exactly as I had found them.  In this case, my saw runs on your typical power grid 60hertz alternating current power supply.  It doesn't matter if you swap the white and black wires, it would still work. 

So there you have it, I could have forked out a lot of money to buy a new saw, but instead I burned through a couple cents worth of electrical connectors and an hour of my time.  Learn to fix your own tools, one day you might have no other choice!

Stay safe out there and God Bless!