First things first:
DISCLAIMER
DISCLAIMER
I AM NOT AN ELECTRICIAN
I am simply providing
information here. Do your research and don't kill yourself and don't burn your house
down. I am not liable for your mistakes...
and yes, I make mistakes too! I don't want you to do something stupid
because of something you thought I said.
On this project I am in constant communication
with and getting all my work inspected by a licensed electrician BEFORE I
CONNECT POWER TO IT! I recommend you do to!
So just like Small's in the movie THE SANDLOT, remember this- "Don't be a
doofus! Don't be a doofus!"
It
may not be the same scene, but I couldn't help myself!
Required Equipment
When you narrow it down, you'll need
these four basic pieces in order to make your installation a success:
1) Transfer Switch
2) Power Inlet Box
3) Power Cable (generator to power
inlet)
4) Power Cable* (power inlet box to
transfer switch)
*A blessing
God dropped a little surprise in my lap with this one. The first owner of our home had installed a hot tub in one of the back rooms and removed it when they sold the house. But instead of taking the wire with them, they cut it back in the panel and at the tub. If discovered this jewel crawling around in the crawl space after some freezing pipe problems. It turned out to be a 10ga 3 (10-3) strand wire with a ground, about 50ft long... this stuff runs for nearly $2/ft at the hardware store. Approximate value: $80. It runs right where I want it to go with some extra left over. Oh yea, 10ga wire is the perfect size for 30 amps of current... just what I need. Pretty cool!Picking out a Transfer Switch
It started out at Menards,
looking at their Generac whole house generators and transfer switches. All they sold were Generac whole house units... and they were expensive. (Note: I tried to go back to where I was, but I didn't work... here's their website though.) Besides, I learned from Steven
Harris that I can only store so much fuel and I want it to hurt a little bit while
I am out of power.
*Propane is an option... but the recent propane shortages have make me think twice about that option!
*Propane is an option... but the recent propane shortages have make me think twice about that option!
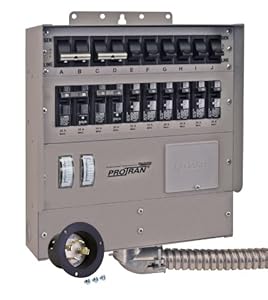
Next, I got on the internet and
started (re)searching. The first product I landed on as a "Reliance Controls 31410CRK Pro/Tran 10-Circuit 30Amp Generator Transfer Switch Kit With Transfer Switch, 10-Foot Power Cord, and Power Inlet Box For Up To 7,500-Watt Generators"
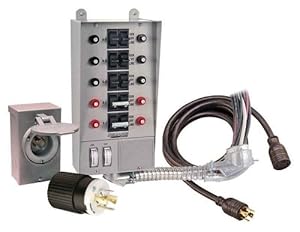
For $370 I liked the idea because I
could power two 240volt circuits with it, but then it would only leave me 6
other circuits. After multiple conversations with Reliance, I was a little worried about the push-button circuit
breakers (Reliance proprietary = you have to order replacements from
reliance). However, it came with everything I needed, short a cable to go
from the power inlet box to the transfer switch. You can read more about how to install one of these here (also referenced below).
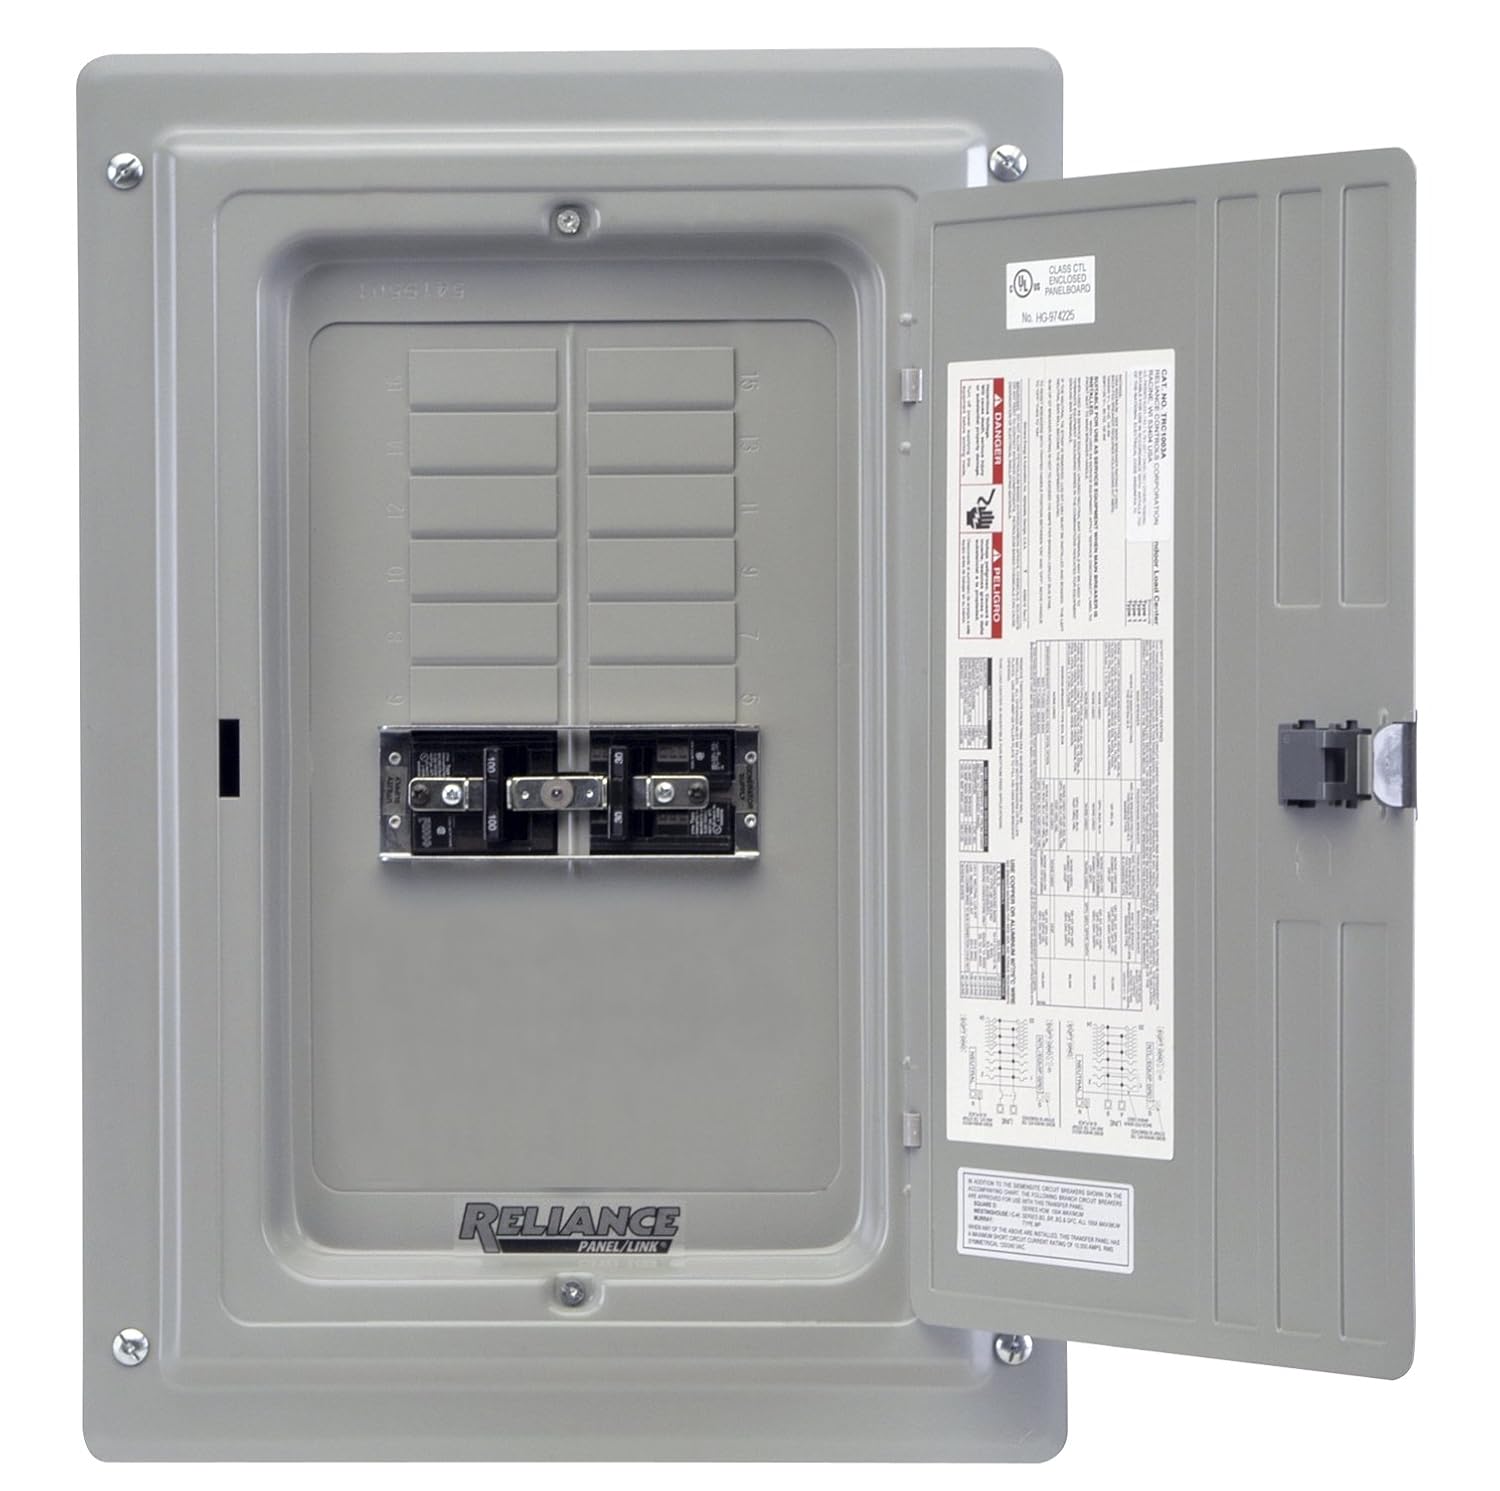
The next place I landed was the
"Reliance Controls Q310A 10-Ciruit TransferSwitch, 125/250-Volt" system for $377.29. Total cost is difference is $7.29 + wire, cable, inlet box, etc- approximately $100-150 more.

I liked this option more because it
used real circuit breakers I can buy from the local hardware store.
However, it still limited me to a total of ten (10) circuits, leaving only 6 if
I power two (2) 240 volt circuits. What it really worth the extra ~$125? I wasn't convinced.
The benefit of both of these systems
is that they are consumer friendly for installation. I spoke with an
electrician who wanted to install a whole house transfer switch at my meter
(outside) for nearly $1000, and I could install two of these for less than
that... it had me thinking.
Where I landed
After a few more hours cruising the Reliance web site, and another phone call to those guys, it finally clicked. My DIY spirit kicked in. Meet the TRC0603C from Reliance.Note: It looks cheaper on Amazon than where I bought it.
Maybe you can save some money at my expense.
 |
| TRC0603D - The D indicates a simple box with no meters or power inlet plug |
The TRC0603C is a full blown
electrical sub-panel. If you check out the Reliance product information, they are very explicit about the fact that "This product is not meant to be installed by your
average do-it-yourself type person." That said, I am going to
do it myself and have it inspected by a certified electrician before I give it
any juice. I feel like this is an acceptable compromise.
The first thing you might consider when looking at this product is the product Model Number, so I'll break that down for you first.
The product model code:
TRC0603C
06 - It has a 60 amp breaker coming in from the main supplied power.
The allowable range for this 30A, 60A and 100A (03, 06 and 10)
03 - It has a 30 amp breaker coming in from the generator.
Same as above: the allowable range for this 30A, 60A and 100A (03, 06 and 10)
C - This unit has current meters measuring the two legs of the power coming into the panel from the generator.
Other options are
A- Power meters* and power inlet plug**
B- Power inlet plug**, no power meters
C- Power meters*, no power inlet plug**
D- No meter, no power inlet plug** (the cheapest option)
*A power meter allows you to balance the legs of your generator. I recommend reading up on the topic if you are confused. I even did the work for you, click here.
**A power inlet plug would come in handy if you installed your sub-panel in your garage, or a similar room, where you could have a power cord coming into the house from your generator. This would make for a much easier installation. This was not an option at my house, as my panel and sub-panel are going in the basement.
Why I went with this option:
1) Cost: The total cost of my
purchase was somewhere around $320 for the panel, the inlet box and the
generator cable. The other
options started out at $370 and went up from there.
2) Number of Circuits: This panel has
room for 12 circuits using standard circuit breakers and up to 20 circuits
using tandem breakers. Obviously that is an improvement over the other
options (10 circuits max).
 |
| The tandem circuit breaker I purchased at Menards, also available on Amazon here |
3) Circuit Breakers: The
cheapest option is to remove the breakers from your main panel and put them
into the sub-panel. It is also nice, in my opinion, to be able to go to
the hardware store and buy replacements (similar to 2nd option
above).
Following up on this one, I learned that my original circuit breaker panel was a different style of panel (check out this page to see what mine looks like). Apparently the old style breaker has "U-clips" and the new ones don't. Regardless, I spent approximately $75 on new circuit breakers to go into my sub-panel... it all adds up!
Following up on this one, I learned that my original circuit breaker panel was a different style of panel (check out this page to see what mine looks like). Apparently the old style breaker has "U-clips" and the new ones don't. Regardless, I spent approximately $75 on new circuit breakers to go into my sub-panel... it all adds up!
4) That would be the easy way, but it wouldn't be the Cowboy Way!
I grew up listening to the Ryders in the Sky radio show, which is where I heard that phrase... although some reports date it to Roy Rogers or earlier. Basically, I wanted to do this right. (Again, you could back-feed a breaker with a suicide cord, but that's dangerous and illegal!)
I wanted to make sure my wife could do this safely, in the middle of the night, in case I am away on business. I'll let you know how that goes if and when it ever comes.
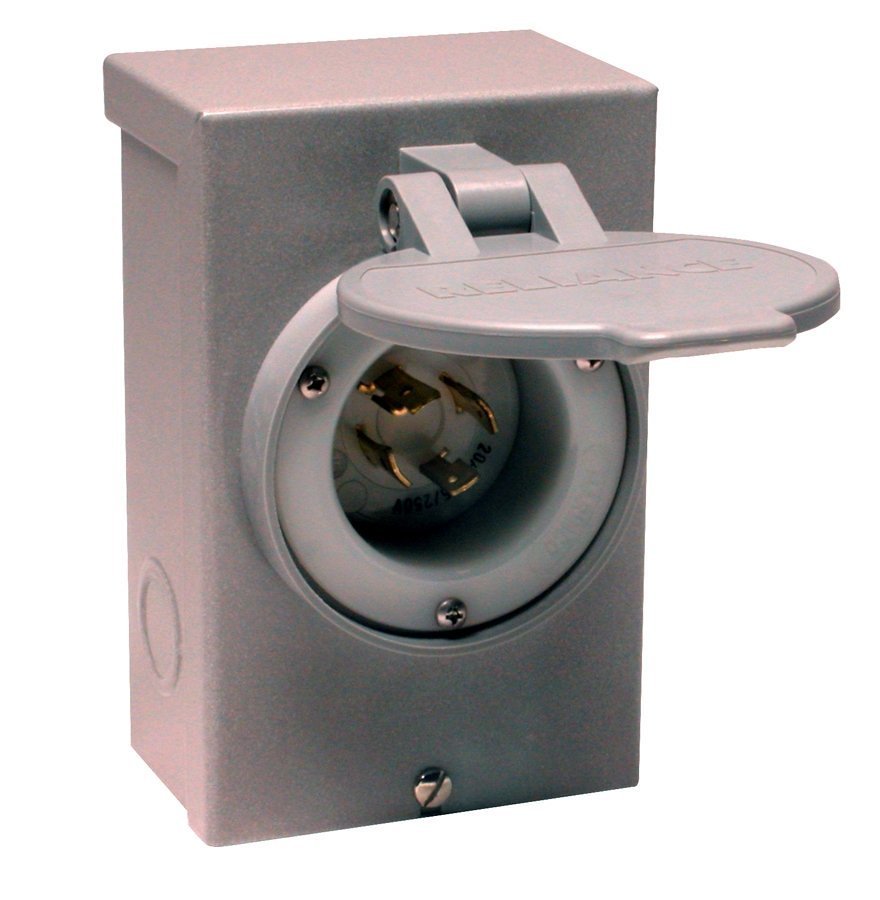
Power Inlet Box:
Okay, so keeping in mind that we are
running 30 amps of power at 240 volts, you don't have a lot of options.
Go over to the Reliance Controls website and you'll find a lot of options. Basically, you can choose any inlet box with a model
number ending in 30. Example - PBN30,
PR30,
PB30.
What I didn't want was the PB31, however. It is a 120 volt ONLY inlet
box. I believe I went with the PB30.
One important note about whatever power inlet box you choose is to note the plug designation, or NEMA Configuration. On this box, it is a L14-30. IMPORTANT! You also want to make sure the plug on your generator matches this!
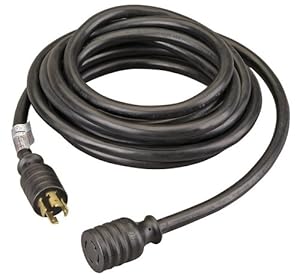
Power Cable:
This is the cable that goes between
your generator and the power inlet box. One important aspect about this
cable is that it has a male adapter on the generator end and a female on the
power inlet box end. This prevents you from plugging it into your
generator and touching hot prongs on the other end of the cable, which could kill
you! (Hence the term suicide cable. Steve talks about them here.)
This, pictured below, is the safe version of a suicide cable!
Now, remember the NEMA Configuration
from the power inlet box? Yea, that comes in handy now. You want to
first make sure you are purchasing a cable that will be able to handle the
current and voltage you need. You also want to figure out how long you
want it to be. For my system I needed to carry 30 amps at 240
volts. Unfortunately I ordered the wrong one (don't do that!). So right now I'm waiting
for my PC3020 to come in the mail. You can note it has four prongs, just
like the power inlet box. (PC = Power Cable, 30 = current, 20 = length in
feet)
Up next, installation!
References
and other recommended reading:
Installing A Generator Transfer Switch at Zach’s
House. 2/12/11: This is where I started my
research, and I recommend you read it too!
Reliance Controls - Where I went to pick my equipment.
Dale Electric
- Where I purchased my equipment.
Alt-Electric
- Another option for purchasing Reliance equipment if you need one
Jack Spirko puts out The Survival Podcast.
I think this his shows are down to earth common sense stuff and a wealth of
knowledge! There are multiple shows where Jack invited Steven
Harris to come on the air, and I'd say he
did a great job covering generators
and hooking them up to your house. Of course, you can listen to all of Steven Harris's
presentations on Jack's show here
along with all the other information Steven has put together for the show.
No comments:
Post a Comment