Well I thought I'd give an update... I trimmed the wooden disk down to a smaller radius, thinking that would be good enough... it wasn't. I just ordered another set of weights ($25) as I don't have the time (or is it energy?) to deal with that right now. Hopefully later on I can come up with the ideal design on some wooden weights...
One thing I did lean, however, is that the wood can harbor mold and yeast cultures... so on second thought, maybe it's not my best idea as of yet...
Showing posts with label Kraut. Show all posts
Showing posts with label Kraut. Show all posts
Tuesday, January 19, 2016

Thursday, January 14, 2016
Videos?
This one is quick... I have a refurbished Cannon T3i camera that can take video in NTSC and PAL format. I'd love to take some videos of what I've been doing to put up on here, but so far have yet to find a good translator from NTSC to MP4 or whatever Microsoft Movie Maker will accept. If any of you have any suggestions or experience with this, please let me know!
In the mean while I'll keep recording in hopes that one day I'll be able to figure it out...
-Clinton
In the mean while I'll keep recording in hopes that one day I'll be able to figure it out...
-Clinton
Thursday, January 7, 2016
DIY Crock weights
 |
| $20 Plus shipping... and a few days... |
Recently I found myself in a pickle... well, it was still a cucumber actually. I had 25lbs of cucumbers packed into my crock with salt, dill and garlic... all in need of a way to submerge them, so they don't get nasty! I'd hard of boiling a rock and putting that on top... eh, no thanks! I'd heard of putting a plate on top and submerging it... there's got to be something better!
Well I decided to take matters into my own hands and see what I could do. In the garage I had a section of 2x12 that I'd bought to make some apple crates... I can work with this! The inside of my 5 gallon crock measured a hair over 11" in diameter, so I figured going a quarter inch under size would give me plenty of wiggle room... so I measured and found the center of the 2x12, on the flat side and made my mark by drilling a small hole through it.
 |
| A blank slate... |
Next I used a scrap piece of wood to create a compass to draw a perfect circle. 10.75 / 2 = 5.375 or 5-3/8in long for my compass. I measured it, marked it and drilled two more holes. The nail seen above goes through the compass into the wood and a pencil goes through the other hole to draw a circle. Next, cutting it out on the band saw and drilling holes so I could pull it out of the crock...
 |
| Houston, we have a problem... |
Well it worked well enough at first, but after a week of being submerged while we were away on a trip, that wood soaked up some water and expanded. When we got home it was wedged in the crock pretty good and going nowhere! I'm actually quite fortunate that it didn't expand more and bust my crock! As you can see above, I had to put some screws into the wood and use my crowbar to pry it out... a quick trim on the band saw (Let's try 10-1/2in diameter this time) and it's good to go! It did seems to require some weight on top of it, as the wood is less dense than the stone... but I cam sure make a bunch of these for the $20-$50 I'd spend on more weights elsewhere!
(See my follow up to this article here)
Lacto-fermenting Dill Pickles, Part 1
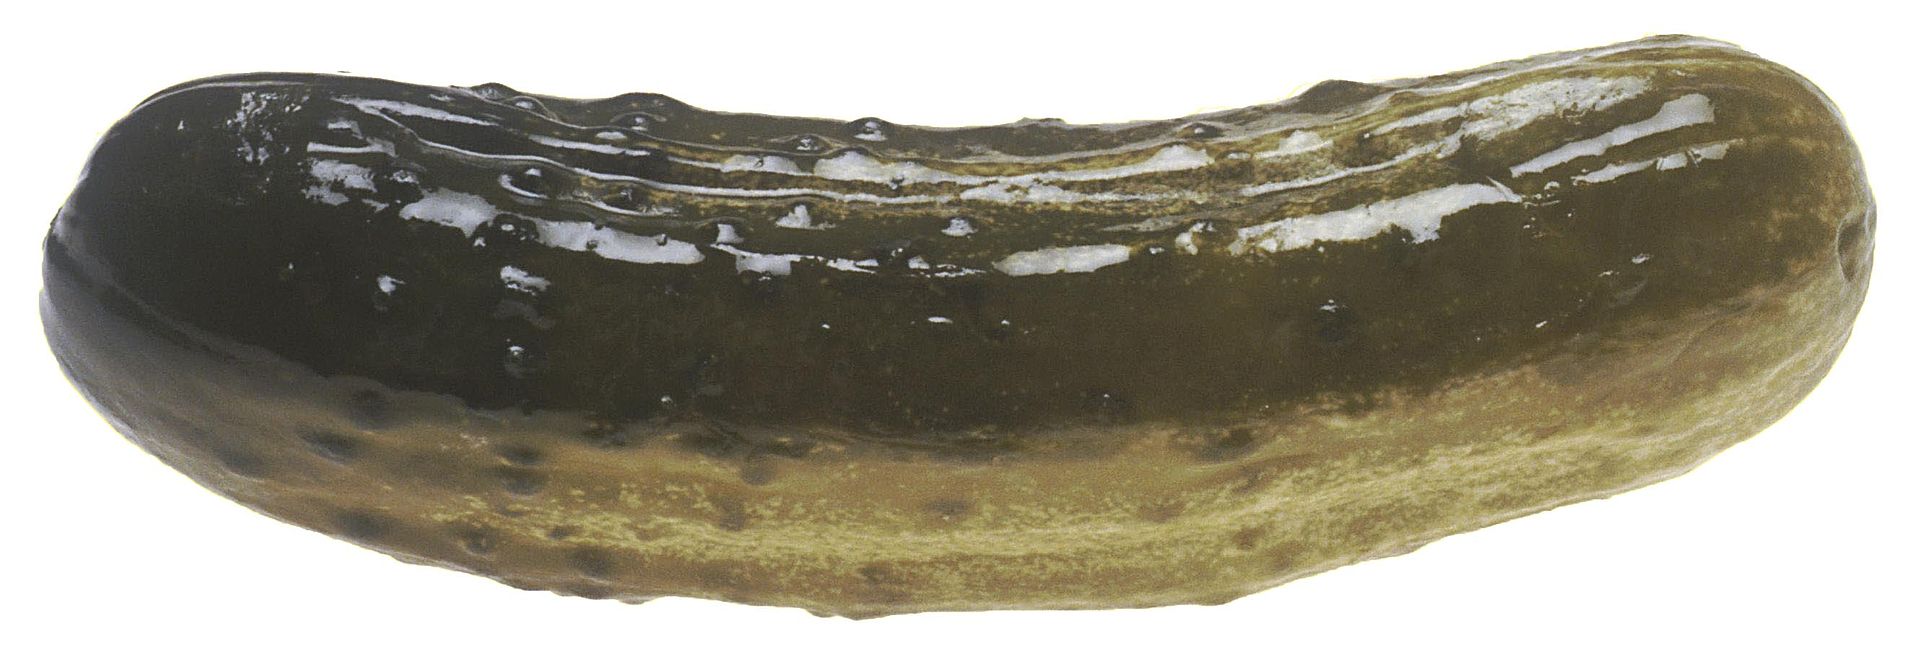 |
| A dill pickle (Thanks Wikipedia!) |
Lacto-fermenting Dill Pickles... it's on everybodies to do list, right? Eh, maybe not so much... but after diving into Sauerkraut for a few months now, we have begun to broaden our horizons! But let me first start off by stating what may be obvious... pickles are pickled cucumbers. The pickling process can either be done using vinegar to provide the acid, OR, in our case, letting Lactobacillus, which lives on the surface of a lot of veggies, digest the veggies and produce lactic acid... while living in a salty environment, which prevents the growth of some nasty bacteria until the acid levels come up.
The recipe we used came out of this book:
 |
| Available on Amazon here |
25lb Pickling Cucumbers
112 cloves garlic
4 cups dill weed
1/2lb Salt (Not sure about this one, my memory is failing me after 2-1/2 weeks)
A couple gallons water... eh, you'll need to check the book out from the library or buy it...
That said, I've got some pictures... those are more fun that reading anyway!
 |
| Pack'em in there! |
The first step for me was to pack a layer of cucumbers in the bottom as tight as I was able to... I didn't think everything was going to fit into our 5 gallon crock.
 |
| Adding the dill, and garlic in there... |
I would pack in a layer, like the first pic, then thrown some garlic in there and half the dill, then do another layer of cucumbers and throw the rest of the spices in... I think there was only two layers before I got this thing about topped off. Either way, the next step didn't go quite as it will next time...
This recipe was for a gallon crock and I scaled it up... only problem, I packed the pickles in a bit tighter than the recipe expected and I didn't have room for all the brine. I can't recall what I did, but I eventually had to taste the brine in the crock and compare the taste to some brine from the book. Next time I'll mix up the brine in a jar and pour it in until I top things off... oh well... it seems to be working so far!
I'll try to take some more pic's and show you what it looks like as it ferments!
Wednesday, November 11, 2015
Take Heed! Watch those fingers...
A few times I have written about using my Borner mandolin slicer... well last night I was using it and I got bit! I won't show you a picture, but needless to say, my thumb ain pretty! Recently I had been discussing with my wonderful wife if we should invest in a quality cabbage slicer... well, I think I answered that question!
Now on order with Amazon is this little wonder of food science creation...
Now one issue with this thing is that I don't see a board that goes inside the "sled" to push down on the cabbage. I'll have to make one of my own, so be on the lookout for that, along with a review.
On another note, we recently purchased another 5 gallon Ohio Stoneware crock. I looked all over the internet and found the best price of roughly $70... then I called the local Ace Hardware... they had one in stock for only $56. Whoohoo! While Ace may not be a "local" store, its sure a step in the right direction compared to Lowes or Menards! While I was there I saw a manual meat grinder (looked decent actually), a food strainer and a few other cool things for a homesteader.... I'm gonna recommend you guys check them out!
So all that to say, we are turning into fermenting fools! I recently checked out a book from the library titled In The Charcuterie: The Fatted Calf's Guide to Making Sausage, Salumi, Pates, Roasts, Confits, and Other Meaty Goods. That's a cool book! It covers broth's, fat's, butchering and processing of meats. Hopefully sometime in the future I'll be able to acquire a sausage press and start making some fermented meats... bu that's a road I'll have to wait to travel until a later stage right now...
To close, keep your fingers away from your blades! They don't play well together...
~Clinton
Now on order with Amazon is this little wonder of food science creation...
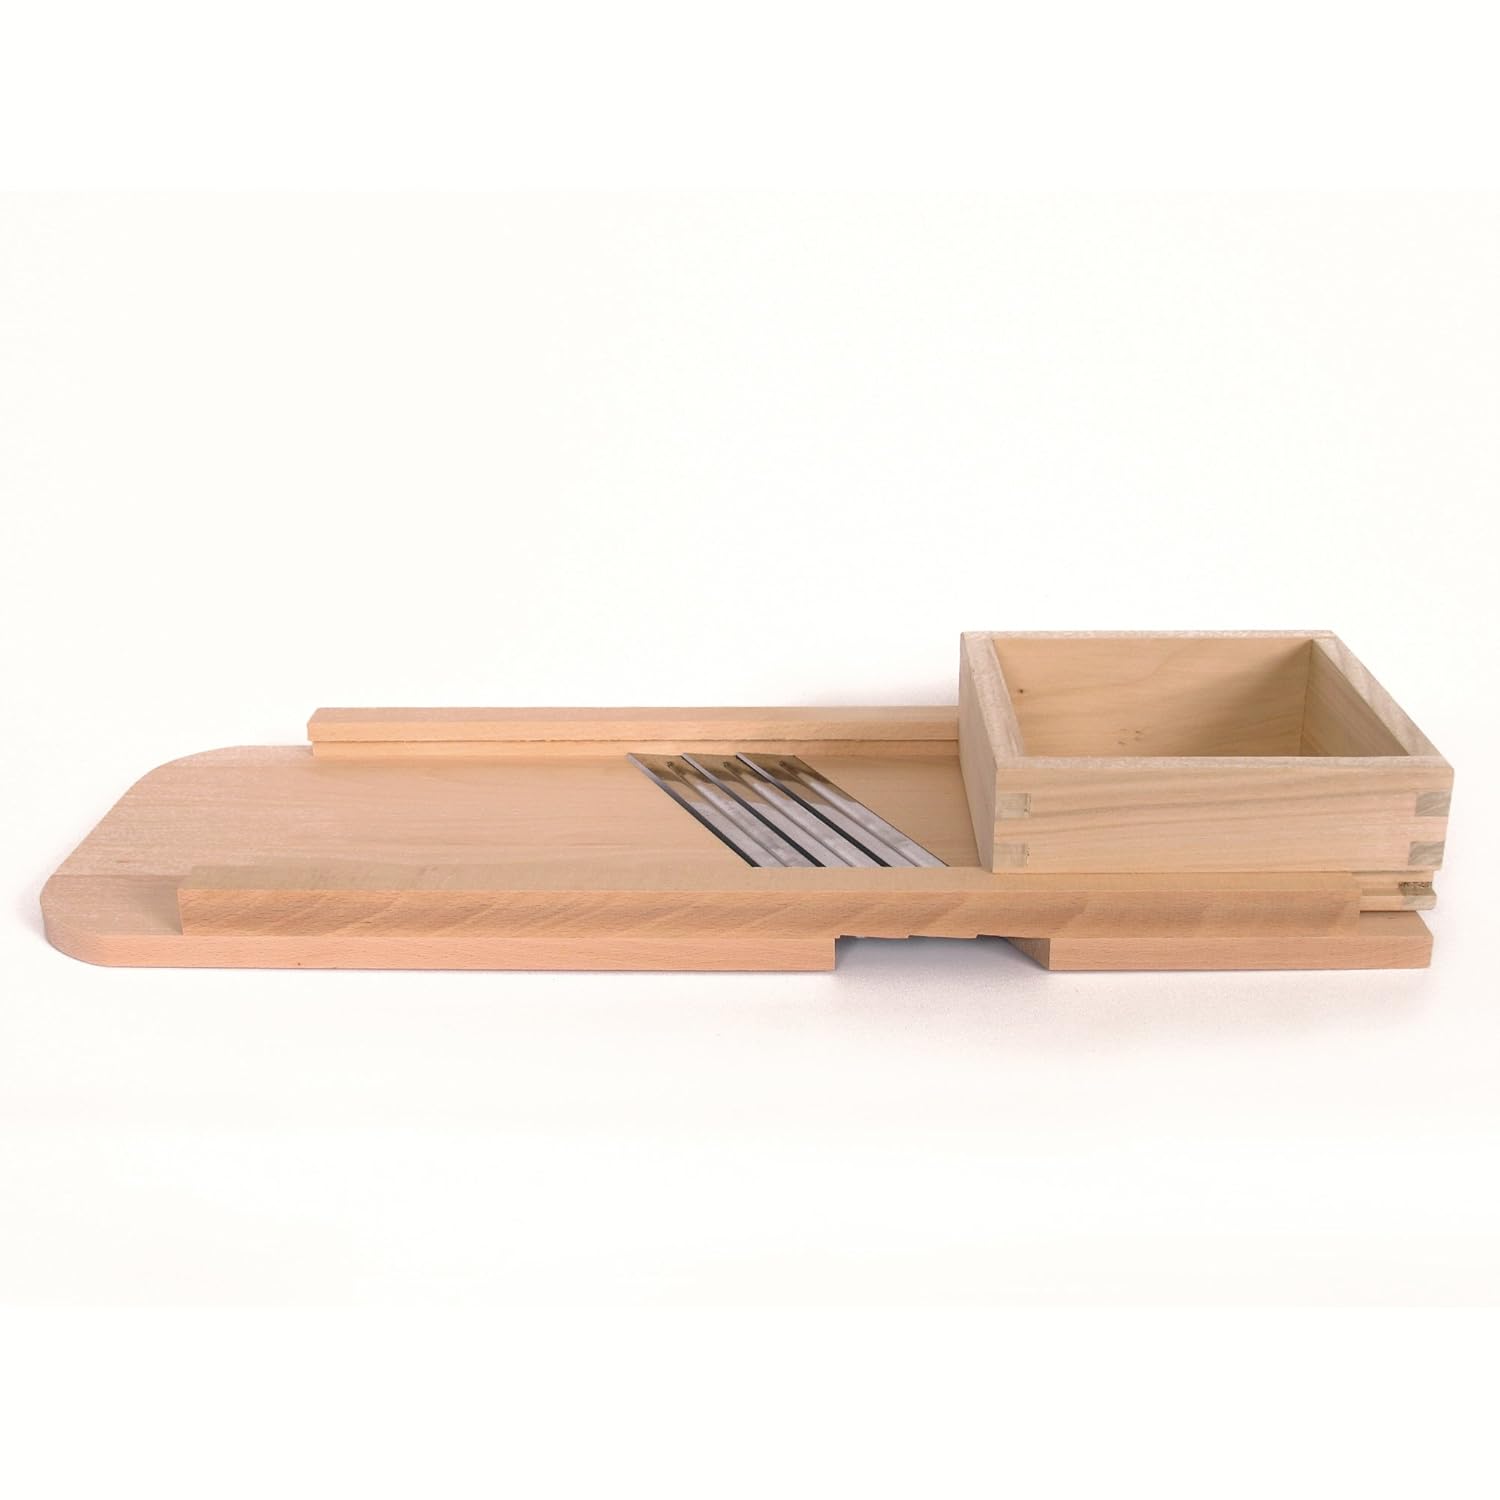 |
Wood Cabbage Shredder - Slaw Board - Large |
On another note, we recently purchased another 5 gallon Ohio Stoneware crock. I looked all over the internet and found the best price of roughly $70... then I called the local Ace Hardware... they had one in stock for only $56. Whoohoo! While Ace may not be a "local" store, its sure a step in the right direction compared to Lowes or Menards! While I was there I saw a manual meat grinder (looked decent actually), a food strainer and a few other cool things for a homesteader.... I'm gonna recommend you guys check them out!
So all that to say, we are turning into fermenting fools! I recently checked out a book from the library titled In The Charcuterie: The Fatted Calf's Guide to Making Sausage, Salumi, Pates, Roasts, Confits, and Other Meaty Goods. That's a cool book! It covers broth's, fat's, butchering and processing of meats. Hopefully sometime in the future I'll be able to acquire a sausage press and start making some fermented meats... bu that's a road I'll have to wait to travel until a later stage right now...
To close, keep your fingers away from your blades! They don't play well together...
~Clinton
Thursday, October 29, 2015
Sauerkraut 2015 Part II - A Lesson in Fermentation
Recently I did a post on making sauerkraut, titled Sauerkraut 2015. I obviously had high hopes for this super food and put a lot of work into it! But let this be a lesson for you all, as it takes too much work to repeat this one!
We made this stuff on a Saturday, covered it with a towel and put it in the basement. It crossed my mine a time or two to go check on it, but I never did until a week had passed. This was, as you can see, A MISTAKE! When I finally got around to checking it, the picture above is what I saw, and it smelled just plain awful! I didn't have much hope, but I started digging anyway.
You can see a small bucket off to the side of the crock that I have begun to fill with the rotten remains of what was supposed to turn into wonderful sauerkraut. I eventually emptied about half of all the kraut out of the crock before I removed, as best I could, any remaining nasty brownish-green nastiness... I probably shouldn't have put it in the compost, but I did anyway (there are good and bad organisms for the garden too).
This last picture is what it looked like after I scrubbed the weights, wiped out the upper walls of the crock and dug out all the bad ferment. We put it back in the basement and just yesterday tried some out, after 3 weeks of fermenting.
I thought it tasted a little "off", but my wife and kids didn't notice anything wrong with it. All I can do now it eat it and hope it is good to go... or I guess I could throw it all out and not risk it... hmm. Well, almost 24hrs now and I feel fine. We'll see how the kids and the wife feel later on and make a final decision!
What happened? Well all I can figure is that the fermentation process created CO2 bubbles, which, having trouble rising to the top, lifted the entire ferment out of the cabbage juice, causing it to spoil. I could be wrong, but that's my best guess! Next time I'll be sure to add some extra brine and keep a closer eye on it!
LESSON: Check your fermenting food often!
Also, we've been diffusing some essential oils recently and I'm not sure if it negatively impacted the bacteria in the crock... but just to be safe, keep your fermenting foods away from your essential oils, as they can kill bacteria too!
 |
| This is NOT what you want your ferment to look like! |
We made this stuff on a Saturday, covered it with a towel and put it in the basement. It crossed my mine a time or two to go check on it, but I never did until a week had passed. This was, as you can see, A MISTAKE! When I finally got around to checking it, the picture above is what I saw, and it smelled just plain awful! I didn't have much hope, but I started digging anyway.
 |
| After digging a little deeper... |
You can see a small bucket off to the side of the crock that I have begun to fill with the rotten remains of what was supposed to turn into wonderful sauerkraut. I eventually emptied about half of all the kraut out of the crock before I removed, as best I could, any remaining nasty brownish-green nastiness... I probably shouldn't have put it in the compost, but I did anyway (there are good and bad organisms for the garden too).
 |
| Let's give it a shot and see what happens! |
This last picture is what it looked like after I scrubbed the weights, wiped out the upper walls of the crock and dug out all the bad ferment. We put it back in the basement and just yesterday tried some out, after 3 weeks of fermenting.
I thought it tasted a little "off", but my wife and kids didn't notice anything wrong with it. All I can do now it eat it and hope it is good to go... or I guess I could throw it all out and not risk it... hmm. Well, almost 24hrs now and I feel fine. We'll see how the kids and the wife feel later on and make a final decision!
What happened? Well all I can figure is that the fermentation process created CO2 bubbles, which, having trouble rising to the top, lifted the entire ferment out of the cabbage juice, causing it to spoil. I could be wrong, but that's my best guess! Next time I'll be sure to add some extra brine and keep a closer eye on it!
LESSON: Check your fermenting food often!
Also, we've been diffusing some essential oils recently and I'm not sure if it negatively impacted the bacteria in the crock... but just to be safe, keep your fermenting foods away from your essential oils, as they can kill bacteria too!
Wednesday, October 21, 2015
Sauerkraut 2015, Making Kraut

SAUERKRAUT
A MODERN DAY SUPER FOOD
Way back in July, I planted a number of cabbage seeds in hopes that they would grow into beautiful heads of greens. About a month back I determined that they were ready for harvest. Last weekend, they were harvested! (With three very young kids, it's hard to get a lot of things done.) In all I think I harvested about 20-25lbs of cabbage... if I can ever remember what kind, I'll try to post it up here.
So what do you do with 25lb of cabbage? Ferment it!
In my last post, Sauerkraut 2015, V2.0 - the story behind the story... I described the reasoning for eating fermented - using naturally occurring lactobacillius vs yeast, which makes alcohol - foods. But one of the hardest things to do is find them AND afford them. At the store a small jar of Kimchi is $6 and Kambucha costs more than a bottle of pop (I don't drink that either). But because I have the cabbage, I can make my own for very little cost at all!
I'll start from the beginning and talk about the different tools as I go through the process. Then I'll go into further detail on how we made ours.
Tools for the job:
 |
| Some of the tools I used... |
Mandolin Slicer
One of my favorite tools to use in the kitchen is a Mandolin Slicer (I need to write a review of it). I think the model I have is a Borner V-slicer I got off Amazon (I think it's this one). It's awesome for making thin slices, sticks or cubes out of just near any vegetable. Just make sure you use the holder... I've caught some skin on those blades a time or two and it is not fun! Yea, it was a little pricey, I know... but it sure makes things go faster! I used this for slicing the beets and the carrots.
 |
| A good knife is a must! |
Knife and cutting board
I've heard of people using pieces of plywood for cutting boards. Not a horrible idea honestly. Put some polyurethane on there and it would probably work just fine for a while. For a knife, we have a nice Henkel kitchen knife that I love! I've heard of people finding great deals at Goodwill, so you might want to give that a shot if you don't have one.
Bowls and Buckets
As you work, it's really nice to have a place to put all of the shredded veggies, especially if you are doing a large batch like we are! Note: Most recipe's I've found are either for 1 quart of kraut or 50lbs of cabbage at a time. You'll most certainly need some big containers if you are doing a 50lb batch!
 |
| Zero your scale for whatever container you are using |
Kitchen Scale
One of the critical aspects of making fermented food safely is the ratio of the salt to the veggies. In the picture above, you can see that I am using a LEM 22lb kitchen scale.
 |
| 5lb Cabbage per Tbsp Salt |
For this recipe I would go with 5lbs of cabbage/veggie mix per Tbsp of salt. (This salt is awesome by the way! It makes my food taste so much better than the regular table salt.) If you don't have enough salt, there are some nasty things that can grow in your kraut, and it won't be good! I highly recommend you use something more accurate than your bathroom scale...
Fermenting Crock
You don't have to go out and get one of these... you could probably use the bucket in the picture above! You do not want to use a metal container as it will react with the acid the fermentation process creates, or so I'm told. Anywho, I got my 5gallon crock for my birthday last year, and it's a beauty! Made not only in the good ole USA, but right here in O.H.I.O. as well! (Go Bucks!)
|
| Weights are used to keep the whole mixture submerged. |
Fermenting Weights
While just about anything, from a smooth rock, a piece of plywood or a plate, all the way down to some specially made weights, will do the trick, it is important that you keep everything you want to ferment submerged during the fermentation process. This keeps nasty stuff like mold from growing in your mix. Every day or so you also want to check your mix for any scum floating on top and get it out! If you don't have enough brine in your crock to cover everything up, you'll need to add more. The ratio is 1 quart water to 1 qt to 3 tsp salt, according to these guys.Making kraut:
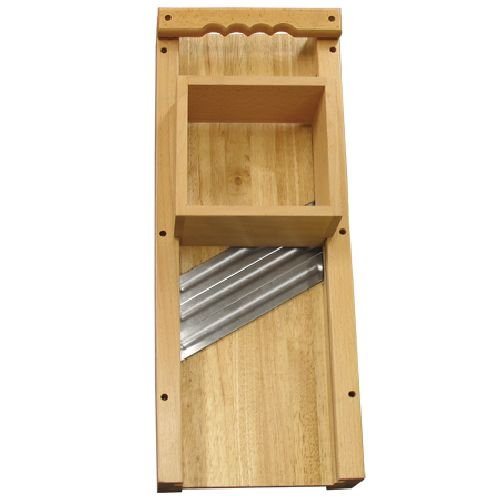 |
| A cabbage slicer |
Slicing Cabbage:
After harvesting, or bringing it home from the store, the first thing you'll need to do is cut up your cabbage. I'd love to have one of these bad boys, pictured above, but I currently am blessed with a nice kitchen knife and cutting board. So instead of nice even slices, I have to use my knife to do my best to evenly slice the cabbage. An evenly sized mix is essential as the smaller the veggie slice, the faster it will ferment. The goal here is to keep everything going at the same speed so you can get a consistent taste and texture... unless you're not into that sort of thing. To each his own... |
| Sliced beets make a nice addition to the kraut. |
To add some color and taste, we add beets and carrots to our ferment. As I mentioned before, Fresh and Fermented has a great recipe for this, which also calls for some green onions. We loosely followed the recipe last time and it was great! This time we left out the green onions and the beets and carrots were probably not to the right ratio, but I think we'll survive.

"Too much salt is bad for you!"
That's what we are told my the mainstream, but I don't know if I believe everything they say. I tend to think that sugar and grains are bad for me too, but I don't see any doctors standing up and telling people to cut that out of their diets, do you?Anyway, for every 5lbs of cabbage and veggies, I would toss in 1 Tbsp (the big measuring spoon, in case you are wondering - 15ml?) After that comes the fun part, unless you are tired. At this point you need to put your mix, in your bucket or bowl, on the ground or something sturdy. I like the ground because it let's me put my weight into it. Then take all your frustration from that week and take it out on the cabbage mix. That's right, pound the snot out of that stuff! Really, do it!
 |
| The mix, salted and ready to receive your frustration! |
The idea here is to break the cell walls of the veggies, causing them to release all of the water they are holding. You really shouldn't have to add a brine to your ferment, as there should be enough water in there to do the job. Some people will go ahead and use a cabbage stomper, like this one, or this one, but I prefer to hold onto my $30 and use the one's God gave me (my fists). Alternately, there's a really good chance a 4' long section of 2x4 would do that job too! (Just make sure it's clean first.)
 |
| After you smash, stomp and beat your cabbage, it should release it's water for you. |
After you have filled up your crock, bucket, mason jar, or whatever with your mix, you'll want to do something to make sure it doesn't float to the surface. I like to take some of the less desirable leaves from the cabbage (you won't find these on the store shelves, I guarantee it!) and make a matt of leaves on top of the mix. Then when I put my weights on top, these keep anything from slipping through the cracks.
 |
| Ready to add weight. |
 |
| Submerging the mix. |
Once you get everything submerged, you are practically finished!
 |
| Sit back and relax! |
Last time we waited about 2 weeks for the process to go before putting it in jars and refrigerating it. This time I plan to let it set for about three weeks before tasting it, and we won't take out the whole batch to refrigerate either. This is supposed to be a food preservation method, and refrigerating 4 gallons of it does defeat the whole purpose!
Remember, the longer it ferments, the more "flavor" it develops. You will have to experiment to determine when you think it tastes the best. When it get's there, refrigerate it! Please, whatever you do, don't can your fermented products! Keep your friends alive!
Sources:
Amazon.com
Ohio Cast Stone
Fresh and Fermented - the book
Okay, let me know if I missed anything. Have a good weekend and God bless!
~Clinton
(This was supposed to post on 10-12-15, but there were some issues... I also had some fermentation issues with this batch. Hopefully I'll be able to remember to put the pic's up soon!)
Subscribe to:
Posts (Atom)